Hands up if you have noticed that English paper piecing is everywhere right now? The ‘hexie’ craze is taking over, and I love it! I can’t stop making them! This tutorial will provide you with all the basic information you need to learn the GLUE BASTING method of creating HEXAGONS.
Hexagons (which are affectionately referred to as hexies) are made using a process called English paper piecing (or EPP). Each hexagon (or EPP shape) is made individually by wrapping fabric around a paper shape, then securing it in place using either stitch basting or glue basting.
And then the shapes are stitched together to form a new ‘fabric’.
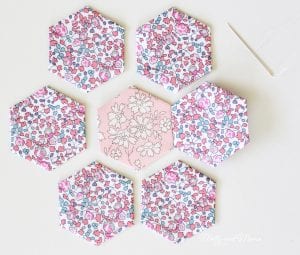
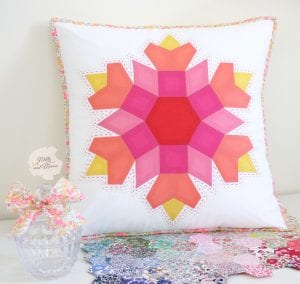
Hexies can be used alone to create lovely patterns and shapes like flowers.
You can also use other shapes like triangles, squares, diamonds, jewels, kites, elongated hexagons and half hexagons. The shapes can tessellate together in endless combinations to create truly beautiful designs.
If you’re just getting started, then hexagons are a nice easy introduction.
Read on to find out about all the materials and supplies I use for basting English paper piecing shapes. You might also like my YouTube video.
Hexagon shaped papers. Hexagons are measured by the length of their sides. 1” side hexagons are a great place to start. You can cut out your own hexagons or other shapes for English paper piecing, using printed templates. If making your own, it’s great to use light weight cardstock. Card that has a semi gloss finish is also especially good.
If you’d like to make some 1 inch sided hexagons at home, I have prepared a simple template for you to make a hexagon flower. Print your hexagons onto light weight cardstock with your home printer, being sure that the page is set to print at 100%, full size, without any scaling or cropping. Once the template has printed, measure the one inch test square to ensure the template printed at the correct size. Carefully cut your papers out, following the lines exactly (accuracy is key).
DOWNLOAD HEXAGON TEMPLATEIf you’re making large projects, or especially concerned about accuracy, you can purchase paper shapes in bulk, from patchwork or quilting stores, or from online suppliers. I like to try different designs and shape combinations.
You can also cut your own templates with a cutting machine like a Cricut. I show you how at this tutorial.
Wherever your EPP shapes come from, the key here is accuracy. You really need the shapes and their sides to be uniform so that they fit together nicely.
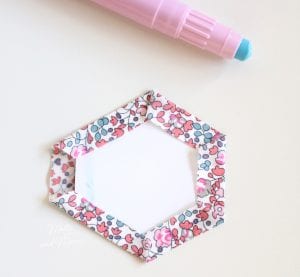
Sewline Glue Pen. You can baste your fabric to your paper with needle and thread, but I really prefer glue basting. Some people use an everyday glue stick, but I like to use a Sewline glue pen, with glue specially formulated for EPP. The tip of the glue pen is fine enough to ensure you don’t end up with glue all over the place. The glue is strong enough to hold the fabric in place, but also easy to remove after stitching your hexagons together. And it’s so much quicker than sew basting. Just be sure you have glue pen refills on hand. They come in very handy! And here’s a quick tip; if you live in a warm climate, keep the glue pen and refills in the fridge. It’ll save you using too much when the warm weather softens the glue.
Fine embroidery needle and thread to stitch the hexagons together. I use a milliner’s needle in Size 9, 10 or 11 (as shown in the tube above). They have a long thin shank and a long thin eye. I like to sew with 60 weight polyester thread (known as bobbin thread) as it glides through the fabric. It can be a little slippery though, so I also use 80 weight cotton thread from Aurifil (as shown on the timber reel above).
Embroidery Scissors for cutting your thread. Small, sharp scissors work best.
Quilting Clips to help hold hexies together when you are stitching them.
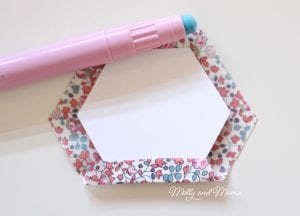
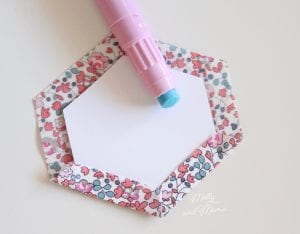
Acrylic Templates so that you can trace your EPP shapes onto your fabric before cutting them out.
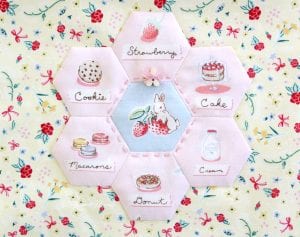
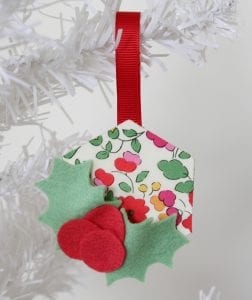
Fabric for your hexagons. Quilter’s cotton is ideal. But I love using fabric as fine as Liberty tana lawn. You can choose to use a couple of different prints for a hexagon flower, or a different print for every hexie. It’s up to you. I also like to fussy cut my fabric. This is where you select an image or print from the fabric that you would like to highlight in your EPP shapes. It might be something simple like these sweet treats.
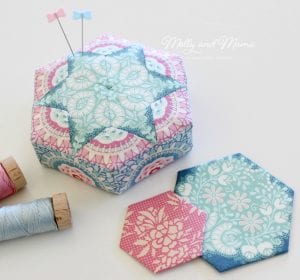
But you can also repeat fabric print designs to create a repeating pattern like I have done here in this pin cushion. This is where the acrylic templates can come in handy.
Once you have your hexagon (or other EPP shape) papers, you can start basting.
If you’d like to make a 1 inch hexagon flower using the method below, you can download your template page HERE.
Here is my method for glue basting. Read on to see detailed photos or watch the video tutorial below.
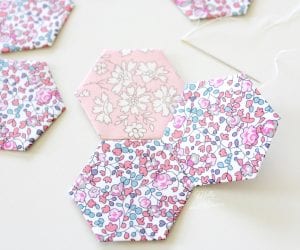
Here’s how to put them together!
Read on for detailed instructions and watch the quick overview video HERE.
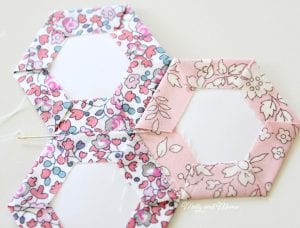
If you sew hexagons into a flower shape, the back of your finished hexagon flower will look like this;
Once you’ve made a few hexies, you won’t be able to stop. I have tutorials and ideas for lots of hexie and EPP projects. Just click on the image to go to the tutorial or pattern.
Have you caught the EPP bug yet? I hope you’ve been inspired. Head to Pinterest for lots of beautiful English paper piecing and quilting ideas.
Instagram is also a great place to go for inspiration. I cohost a weekly English Paper Piecing party with my friend Larisa from Stitching Notes. Check out hashtag #sipteaandepp for all things relating to EPP. You can also search the hashtags #hexies, #hexagons or #englishpaperpiecing.
I hope you’ve found this tutorial helpful. If you’ve got a tip to share, feel free to leave a comment.
Happy stitching, Lauren x